
Epoxy flooring is a multi-layer concrete coating system, not a single coat of paint. Its performance depends on whether the concrete is properly assessed, mechanically prepared, repaired, dry enough for the selected products, and coated within the correct application windows.
Surface dust, oil, old paint, weak concrete, moisture vapour, and rushed preparation can all affect adhesion.
For this reason, the visible finish is only one part of the installation; the preparation and coating build-up beneath it determine how well the floor handles traffic, cleaning, heat, chemicals, and daily wear.
Before Installation
Before epoxy is applied, the installer checks the concrete and selects a coating system suited to the area.
- Inspect the concrete: Check for cracks, holes, spalling, weak concrete, uneven areas, drainage issues, and existing paint, sealers, adhesives, or failed coatings.
- Identify contamination: Oil, grease, tyre residue, silicone, chemicals, and surface dust must be removed because epoxy only bonds as well as the concrete beneath it.
- Assess cracks and joints: Static cracks can usually be repaired. Expansion and movement joints need the correct treatment so slab movement does not crack the finished coating.
- Test for moisture: Concrete can release moisture vapour even when it looks dry. Excess moisture can cause bubbling, blistering, peeling, or adhesion failure.
- Choose the right coating system: The floor’s traffic, sunlight exposure, water exposure, chemical risks, and finish requirements determine the primer, epoxy build-up, topcoat, and slip-resistance level.
- Confirm the finish: Full-flake, solid-colour, metallic, and textured floors use different application methods. Outdoor areas also need a UV-stable topcoat, while wet areas may require an anti-slip aggregate.
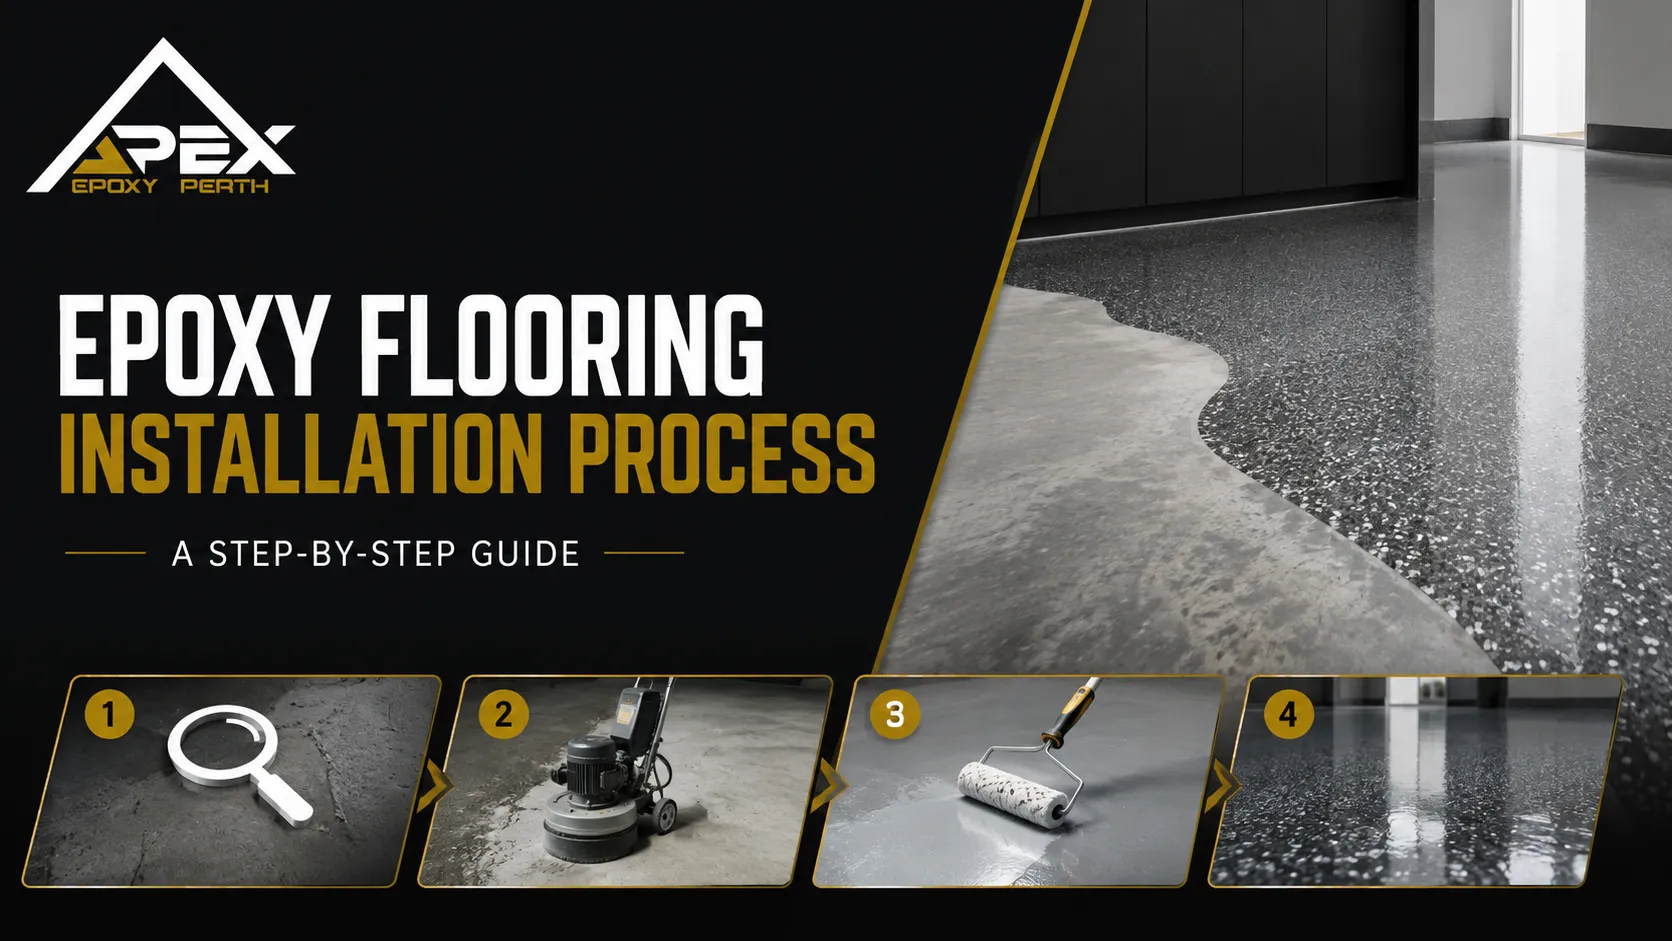
The Epoxy Flooring Installation Process: Step by Step
The exact product sequence can vary by manufacturer and floor type, but professional epoxy flooring installation follows a controlled process. Each stage supports the next one.
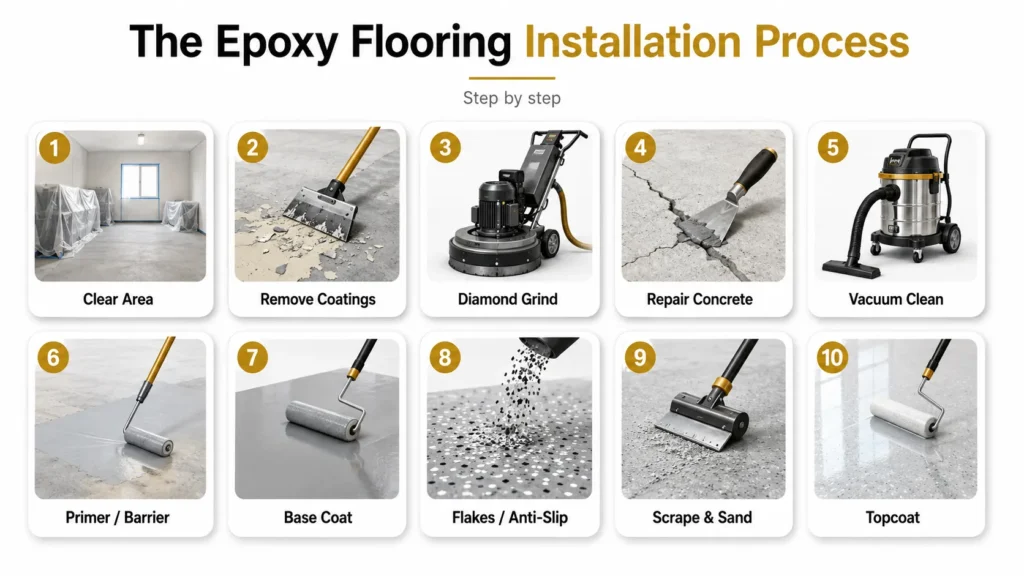
Skipping or rushing a stage can affect the final appearance and lifespan of the floor.
| Step | What happens | Main purpose |
| 1 | Clear and protect the work area | Create safe access and prevent damage to nearby surfaces |
| 2 | Remove coatings and contaminants | Eliminate materials that stop adhesion |
| 3 | Diamond grind the concrete | Create a clean mechanical surface profile |
| 4 | Repair damaged concrete | Remove weak points and create an even substrate |
| 5 | Vacuum and final-clean the slab | Remove grinding dust and loose material |
| 6 | Apply primer or moisture barrier | Improve adhesion and manage substrate conditions |
| 7 | Apply the epoxy base coat | Build the main colour and coating layer |
| 8 | Add flakes, pigment, or anti-slip aggregate | Create the selected finish and texture |
| 9 | Scrape, sand, and vacuum | Prepare the coating for the topcoat |
| 10 | Apply the protective topcoat | Seal and protect the completed epoxy system |
Step 1: Clear and Protect the Work Area
The floor must be completely accessible before preparation starts. In a garage, this means removing vehicles, shelving, storage boxes, floor mats, tools, and loose equipment.
In homes or commercial spaces, furniture, stock, machinery, and movable fittings may also need to be relocated.
The installer then protects nearby areas from dust and coating material. Diamond grinding produces fine concrete dust, while epoxy and topcoats can splash or transfer onto adjoining surfaces if the area is not properly masked.
Before work begins, the installer will usually:
- Remove items from the floor and create clear access around the entire slab
- Mask lower wall edges, doors, cabinets, drains, and adjoining finishes where needed
- Protect garage door tracks, entry thresholds, and nearby flooring
- Plan where equipment, grinding hoses, and coating materials will be positioned
- Confirm the starting point, working direction, and exit route
- Arrange ventilation and restrict access to the work area
Planning the exit route is important. Once the epoxy base coat is applied, the installer must be able to leave the area without walking through wet coating. A poorly planned application can leave footprints, roller marks, or damaged edges in an otherwise good floor.
For occupied homes and commercial sites, this stage also sets expectations around downtime. The area needs to remain clear during grinding, coating, and curing.
People, pets, furniture, and vehicles should not return until the coating system has reached the appropriate service stage.
Step 2: Remove Existing Coatings, Paint, Oil, and Surface Contaminants
Epoxy needs to bond directly to clean, sound, properly prepared concrete. Anything sitting between the epoxy and the concrete can weaken that bond.
Common contaminants include old paint, sealers, adhesives, failed epoxy coatings, oil, grease, tyre residue, silicone, wax, curing compounds, and chemical spills. These materials may not always be visible.
A garage floor can look clean while still containing oil or silicone residue that affects adhesion.
The treatment depends on the contamination:
- Old paint or failed epoxy: Usually needs mechanical removal so the new system bonds to the concrete rather than the old coating.
- Oil and grease: Need cleaning and, where contamination has penetrated the surface, further mechanical removal.
- Adhesive and glue residue: Must be removed because it can soften, react, or release from the concrete beneath the new coating.
- Sealers and curing compounds: Need to be removed because they can block the epoxy from penetrating the concrete profile.
- Weak or dusty concrete: Must be ground back until sound concrete is exposed.
A surface wash or degreaser can help remove contaminants from the top of the floor. However, cleaning alone is not enough when oil has soaked into the slab or when existing coatings are poorly bonded.
Applying epoxy over these issues can create localised peeling, bubbling, or delamination later.
This step is especially important for garages and workshops. Vehicle fluids, tyre dressings, lubricants, and chemical spills can build up gradually over years.
The installer must remove the affected material before coating begins rather than hoping the epoxy will seal it in.
Step 3: Diamond Grind the Concrete for Mechanical Adhesion
Diamond grinding is the most important preparation stage in a professional epoxy flooring installation. It creates the mechanical surface profile the coating needs to bond to the concrete.
A floor grinder fitted with diamond tooling removes weak surface material and opens the pores of the slab.
The machine is normally connected to dust-extraction equipment to control concrete dust while the floor is prepared.
Grinding serves several purposes at the same time:
- Removes weak surface laitance left from the concrete curing process
- Removes remaining paint, sealers, and surface residue
- Opens the concrete pores so the primer and epoxy can bond properly
- Creates a consistent surface profile across the floor
- Levels minor high spots and reduces visible surface irregularities
- Reveals hidden cracks, pits, weak concrete, and previous repairs
- Prepares the floor edges, corners, and doorways with smaller grinding tools
Laitance is a weak, dusty cement layer that can form on the surface of concrete. It may appear solid, but it does not provide a reliable surface for epoxy. If a coating is applied over laitance, the epoxy may bond to the weak layer instead of the stronger concrete below it.
The goal of diamond grinding is not to make the floor perfectly smooth. A perfectly polished surface can be too dense for some coating systems.
The goal is to create the correct profile for the primer and epoxy to grip.
This is why professional epoxy flooring is different from simply rolling a coating over a cleaned floor. The bond is created through mechanical preparation, not just surface cleanliness.
Step 4: Repair Cracks, Spalling, Holes, and Damaged Areas
After the concrete has been ground, the installer can see the slab’s true condition. Small cracks, pitted areas, holes, chips, spalling, and previous patch repairs often become more visible once the weak surface layer has been removed.
These defects should be repaired before the coating layers are applied. Epoxy can follow the shape of the concrete beneath it, so untreated damage can remain visible through the finished floor or create a weak point in the system.
The repair method depends on the defect:
- Hairline and static cracks: Can often be opened, cleaned, filled with a compatible repair material, and ground flush.
- Holes and small pits: Are filled and levelled so they do not leave visible voids in the finished coating.
- Spalling or broken concrete: May need damaged material removed before a stronger patch repair is installed.
- Uneven previous repairs: Are ground smooth so they blend with the surrounding floor.
- Movement or expansion joints: Need different treatment because they are designed to move with the slab.
Not every crack should be filled in the same way. Static cracks can often be repaired before coating. However, control joints and expansion joints may need to remain flexible or be carried through the finished system. Coating over an active joint without allowing for movement can cause the new finish to crack in the same location.
This step improves both appearance and durability. It is particularly important for solid-colour and metallic epoxy floors because their smooth finish can show every crack, patch, and uneven area beneath the coating.
Step 5: Vacuum and Clean the Prepared Concrete Surface
Grinding and repairs create fine concrete dust, loose particles, and debris. Before primer or epoxy is applied, the floor needs a thorough final clean.
The installer vacuums the full surface, including corners, wall edges, repaired areas, doorways, and joints.
The floor is then checked for anything that could interfere with bonding, such as remaining dust, loose repair material, oil residue, paint, adhesive, or surface debris.
This stage is critical because epoxy applied over dust is bonding to the dust rather than directly to the prepared concrete. Even when the coating looks acceptable at first, dust beneath the system can reduce adhesion and create weak areas that may fail under traffic.
Before the first coating layer is applied, the floor should be:
- Clean and free from grinding dust
- Dry enough for the selected coating system
- Free from loose concrete, flakes, or repair debris
- Free from visible oil, grease, paint, or adhesive residue
- Mechanically prepared across the entire coating area
- Repaired and levelled where required
The installer should also check the edges and transition points at this stage. These areas are easy to miss but often receive regular foot traffic, tyre traffic, or cleaning exposure.
Once the floor is clean, dry, and sound, it is ready to receive the first coating layer.
Step 6: Apply a Primer or Moisture Barrier Where Required
A primer is applied to help the epoxy system bond to the prepared concrete. It penetrates the surface profile created by grinding and provides a stable base for the next coating layer.
Not every floor needs the same primer. The correct product depends on the condition of the concrete, moisture results, coating system, and expected floor use.
A primer may be used to:
- Improve adhesion between the concrete and epoxy system
- Reduce pinholes caused by air escaping from porous concrete
- Seal highly absorbent concrete before the main epoxy coat
- Create a consistent base for the coating build-up
- Support a moisture-control system where the slab requires it
Where moisture levels are higher than the selected epoxy system allows, the installer may use a compatible moisture-tolerant primer or moisture barrier.
This is not an optional extra added for appearance. It is a technical part of the coating system where the slab needs it.
The primer must be applied at the required coverage rate. If it is applied too thinly, highly porous areas may remain unsealed. If it is applied too heavily, it can affect drying, recoat timing, and the bond between layers.
After priming, the installer waits for the correct recoat stage. Every product has a recommended application window.
Applying the next coat too early or too late can affect intercoat adhesion. If the recoat window is missed, the surface may need additional sanding or preparation before work continues.
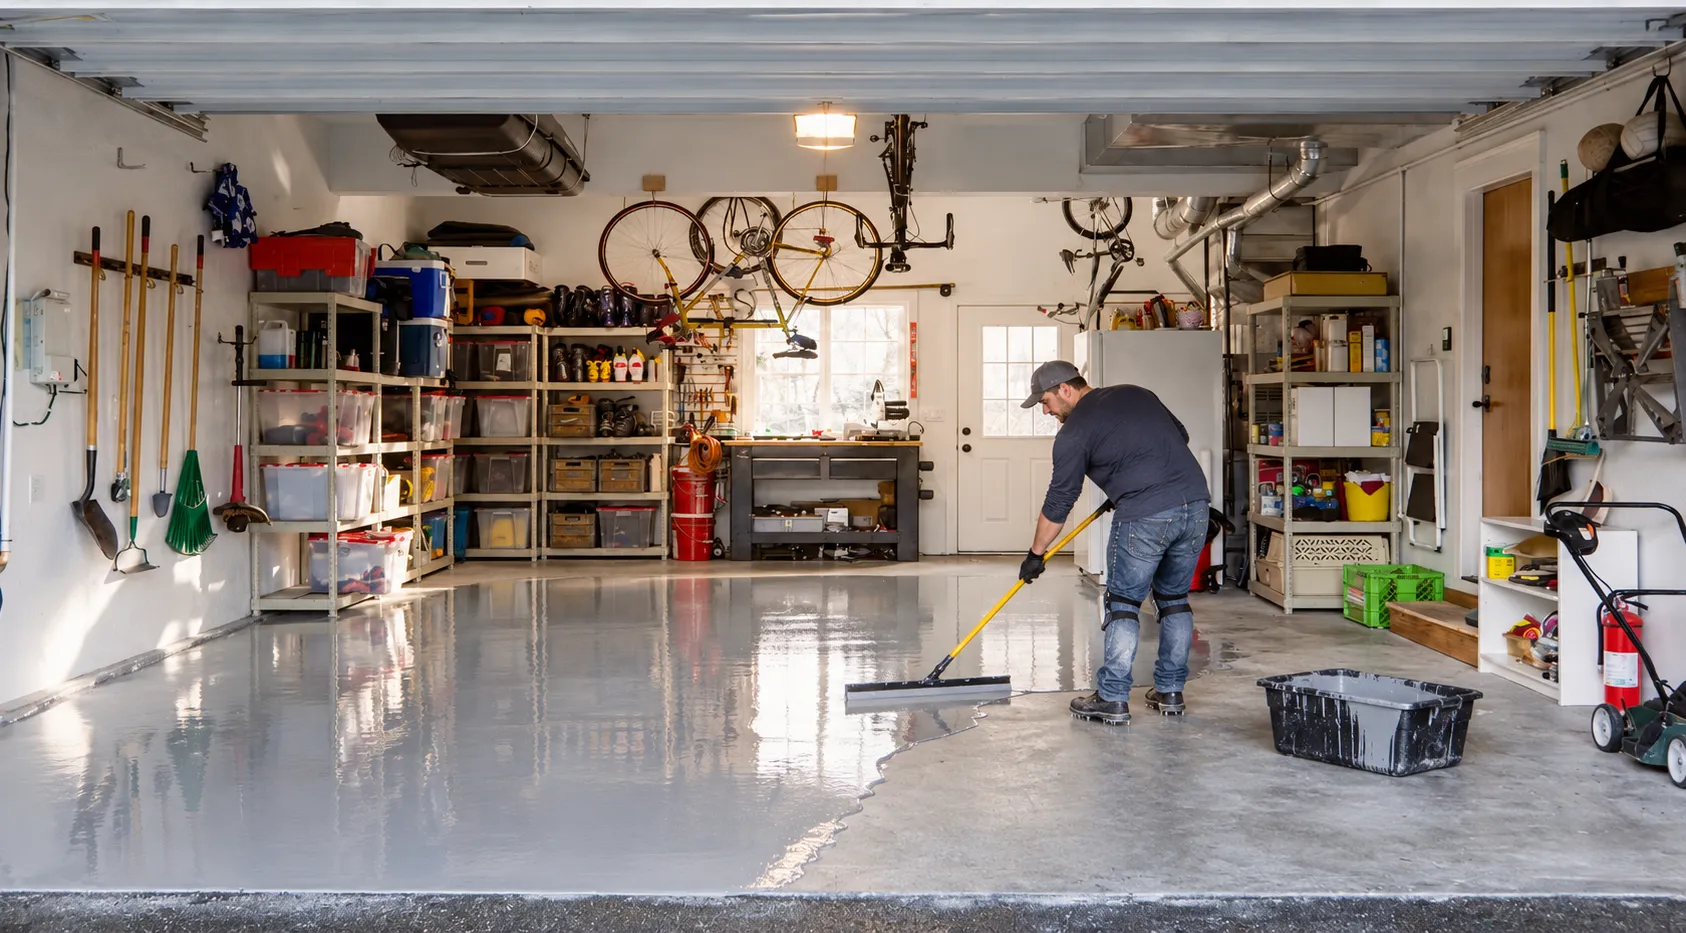
Step 7: Mix and Apply the Epoxy Base Coat
The epoxy base coat forms the main foundation of the coating system. It provides the colour layer in a solid-colour floor and creates the wet layer that holds decorative flakes in a full-flake system.
Epoxy is generally supplied as two separate components: resin and hardener. These must be mixed at the manufacturer’s specified ratio and for the required mixing time.
Incorrect mixing can lead to soft spots, uneven curing, tacky areas, poor chemical resistance, or coating failure.
Once mixed, epoxy has a limited working time known as pot life. The installer must apply it before the product becomes too thick or begins to react excessively in the mixing container.
The base-coat application process normally includes:
- Mixing the resin and hardener correctly according to the selected product system.
- Pouring the mixed epoxy onto the floor in controlled ribbons rather than leaving it in the bucket.
- Spreading the coating with a squeegee to achieve even coverage.
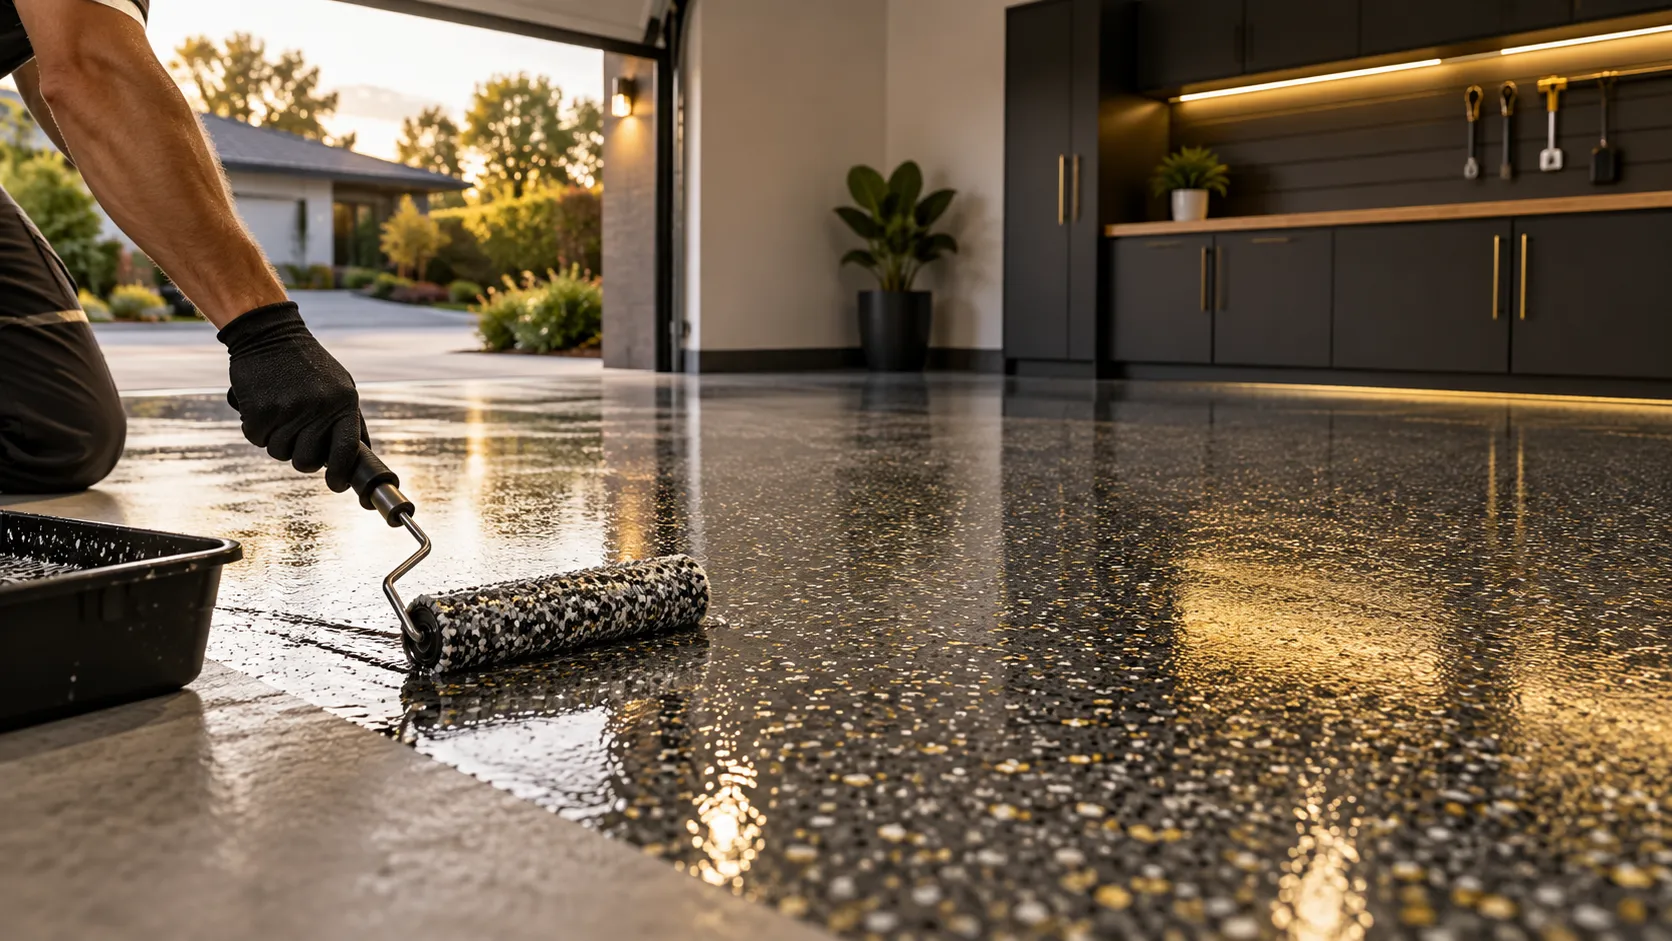
- Back-rolling the surface to remove application lines and create a consistent finish.
- Cutting in edges and detailed areas around walls, doors, drains, and transitions.
- Checking coverage continuously so the coat is neither too thin nor heavily pooled.
The application team needs to work methodically because epoxy does not stay workable indefinitely. Large floors are often divided into manageable sections, with each section spread and back-rolled before the product begins to close.
The base coat must remain even across the floor. Thin areas can reduce durability, while puddles, heavy edges, and roller marks can affect the finished appearance. This is particularly visible in solid-colour and metallic epoxy systems.
Step 8: Broadcast Decorative Flakes or Add Colour and Anti-Slip Aggregate
This step depends on the type of epoxy floor being installed. Full-flake floors require decorative flakes, while solid-colour and metallic systems use different finishing methods.
For a full-flake epoxy floor, vinyl flakes are broadcast into the wet base coat while the epoxy is still open. In a full-broadcast system, flakes are applied until the wet epoxy is completely covered rather than lightly scattered across the surface.
The flakes serve several purposes:
- Create a multi-colour decorative finish
- Help disguise dust, small marks, and minor substrate variation
- Add visual texture to the floor
- Reduce the plain glossy appearance of a solid-colour coating
- Create a finish suited to garages, workshops, and residential spaces
The flakes need to be applied evenly. Areas with too few flakes can look patchy, while poorly distributed flakes can create inconsistent colour or texture. The installer works across the floor systematically to maintain an even full-broadcast finish.
For solid-colour epoxy floors, the base coat itself may provide the finished colour. A decorative flake layer may be omitted entirely.
For metallic epoxy floors, specialised pigments are worked into the coating to create movement, depth, and variation. The final pattern depends on the selected colours, base layer, application technique, and lighting in the room.
Where additional traction is required, the installer can include a suitable anti-slip aggregate in the coating system. This is often considered for:
- Pool surrounds
- Outdoor patios and pathways
- Ramps
- Workshops
- Commercial kitchens
- Wet areas
- Floors exposed to regular water or chemical spills
The level of texture should match the area’s use. Too little texture can be unsuitable for wet areas, while too much texture can make the floor harder to clean.
Step 9: Scrape, Sand, and Vacuum the Surface Before Topcoating
This step is mainly required for full-flake epoxy systems. After the flake coat has cured, the surface needs to be prepared before the protective topcoat is applied.
The floor will have loose flakes, raised flakes, and uneven edges after broadcasting. These need to be removed or levelled so the topcoat can form a clean, durable, and even protective layer.
The installer generally:
- Scrapes the floor in multiple directions to remove loose and upright flakes
- Levels sharp flake edges that could remain exposed through the topcoat
- Lightly sands high points or rough sections where required
- Vacuums the full surface to remove loose flakes and fine dust
- Checks the floor for thin flake coverage, uneven areas, or contaminants before topcoating
Scraping in more than one direction matters because flakes can sit at different angles across the floor.
A single pass may leave raised edges behind, which can affect the look and feel of the finished surface.
This stage determines how refined the final floor feels underfoot. If the flakes are not scraped and cleaned properly, the clear topcoat can look uneven, feel rough, or leave sharp edges exposed.
For solid-colour and metallic epoxy systems, sanding may still be required between coats if the recoat window has passed or if the previous layer needs to be smoothed before the next coat is applied.
Step 10: Apply the Protective Clear Topcoat
The topcoat is the final working layer of the epoxy flooring system. It seals the base coat and decorative flakes, creates the final sheen, and provides the surface that will handle daily traffic, cleaning, tyre contact, spills, and wear.
A clear topcoat is commonly used over full-flake and metallic epoxy floors. Solid-colour systems may use a clear or pigmented topcoat, depending on the required look and performance.
The right topcoat is selected based on the environment. It may provide:
- Abrasion resistance for garage, warehouse, workshop, and commercial traffic
- Chemical resistance for workshops, industrial areas, and spill-prone floors
- UV stability for exposed outdoor areas
- Gloss, satin, or matte finish options
- Anti-slip performance where additional traction is required
- Improved cleanability by sealing the decorative or textured layer beneath it
For outdoor concrete coatings, UV stability is particularly important. Standard epoxy can yellow, fade, or chalk under long-term sunlight exposure. A suitable UV-stable topcoat, such as a compatible polyaspartic or polyurethane coating where appropriate, helps protect the finish in exposed areas.
The topcoat is applied evenly across the floor and then left to cure. The coating may look dry within a short period, but it still needs time to build full strength.
Walking, furniture placement, vehicle traffic, wet cleaning, or chemical exposure should only resume after the product system’s recommended return-to-service time.
How Long Does Epoxy Flooring Take to Dry and Fully Cure?
Epoxy flooring does not reach full strength as soon as it feels dry. The coating can become touch-dry or suitable for light foot traffic before it is ready for furniture, vehicles, cleaning equipment, chemicals, or heavy use.
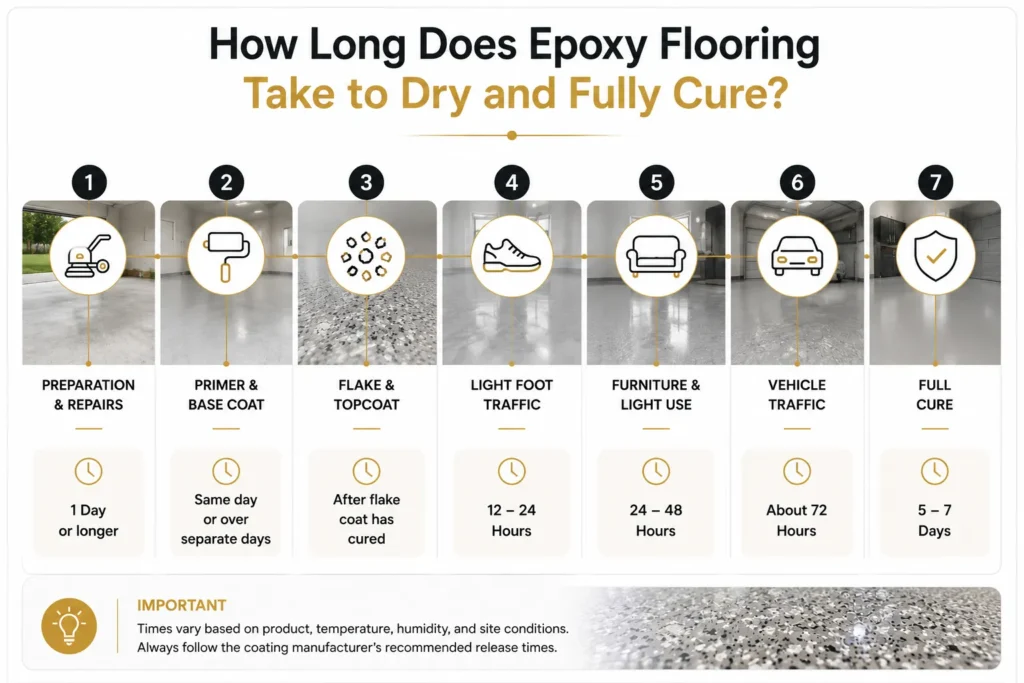
The total installation time depends on the floor size, condition of the concrete, repairs required, number of coating layers, selected products, temperature, humidity, and curing conditions.
| Stage | Typical planning guide | Important consideration |
| Surface preparation and repairs | One day or longer | Damaged, coated, or contaminated concrete takes more time |
| Primer and base coat | Often completed on the same day or over separate days | Depends on recoat windows and product system |
| Flake scraping and topcoat | Usually completed after the flake coat has cured | Full-flake systems require an additional preparation stage |
| Light foot traffic | Often 12–24 hours after the final coat | Avoid dragging items or wet cleaning |
| Furniture and light use | Often 24–48 hours after the final coat | Avoid heavy point loads and abrasive traffic |
| Vehicle traffic | Commonly about 72 hours or longer | Follow the coating manufacturer’s release time |
| Full cure | Often 5–7 days | Avoid chemicals, heavy use, and pressure washing before full cure |
These timeframes are general planning guides only. Some rapid-cure epoxy and polyaspartic systems can have shorter return-to-service times, while cooler weather, high humidity, extensive repairs, or moisture barriers can extend the program.
The final release time should always follow the selected product system, not a generic rule.
How Does the Installation Process Change for Different Floors?
The core process remains the same: inspect, prepare, repair, coat, and cure. However, the coating system, texture, topcoat, and installation schedule change according to where the floor is located and how it will be used.

1. Full-Flake Epoxy Garage Floors
Full-flake epoxy garage floors are built using a pigmented base coat, decorative vinyl flakes, and a protective topcoat.
The flakes are broadcast into the wet base coat until the surface is fully covered. Once the coating cures, loose flakes are scraped away, the floor is vacuumed, and a clear protective topcoat is applied.
This system is popular for garages because the multi-colour flake finish hides dust, tyre marks, and minor imperfections better than a plain solid-colour floor. It also creates a more textured appearance.
Garage preparation is especially important because concrete often contains oil, tyre residue, old paint, and weak surface material. The floor must be diamond ground and repaired before the flake system is installed.
2. Solid-Colour and Metallic Epoxy Floors
Solid-colour epoxy floors require a consistent and well-prepared substrate because there is no flake layer to disguise uneven areas, roller marks, or visible repairs. Concrete repairs must be ground smooth, and the coating must be applied evenly across the entire floor.
Metallic epoxy floors need even more control because their visual effect is created through pigment movement, application technique, lighting, and the underlying base colour.
The result is designed to have variation, but poor preparation or inconsistent application can still affect the appearance.
Both systems require the same foundations: mechanical preparation, crack repair, moisture assessment, compatible primer selection, and correct recoat timing.
3. Outdoor Epoxy and Concrete Coatings
Outdoor concrete coatings need to handle sunlight, rain, temperature changes, wet-slip risks, and surface drainage. Not every epoxy system is suitable for direct exposure to ultraviolet light.
For patios, alfresco areas, pool surrounds, driveways, and paths, the coating system should be selected for the specific environment. This may include a UV-stable topcoat, anti-slip aggregate, and a finish that suits water exposure and cleaning needs.
Outdoor work also depends on weather conditions. The concrete must be dry, and the installation should not proceed when rain, condensation, or unsuitable temperatures could affect the coating.
The underlying concrete is just as important outdoors as it is indoors. Cracks, drainage issues, unstable repairs, and weak concrete should be addressed before coating begins.
4. Commercial, Warehouse, and Workshop Epoxy Floors
Commercial and industrial epoxy floors are specified around operational requirements rather than appearance alone.
A warehouse may need a floor that handles pallet jacks, forklifts, and regular cleaning. A workshop may need chemical resistance and a textured finish.
A showroom may prioritise appearance, durability, and easy maintenance.
The coating system may be selected based on:
- Vehicle and machinery traffic
- Chemical exposure and spill risks
- Abrasion from wheels, trolleys, and equipment
- Safety markings and line marking requirements
- Slip resistance
- Cleaning methods
- Required downtime and staged access
Large commercial floors may be completed in sections to keep part of the site operational. The work schedule needs to account for preparation, coating layers, cure time, and safe return to service.
DIY Epoxy Kits vs Professional Epoxy Flooring Installation
A DIY epoxy kit can be suitable for a small, dry, low-traffic area with clean and undamaged concrete.
However, the coating itself is only one part of the job. Most epoxy flooring problems begin beneath the visible finish, where oil contamination, poor surface preparation, moisture, weak concrete, cracks, or old coatings have not been properly addressed.
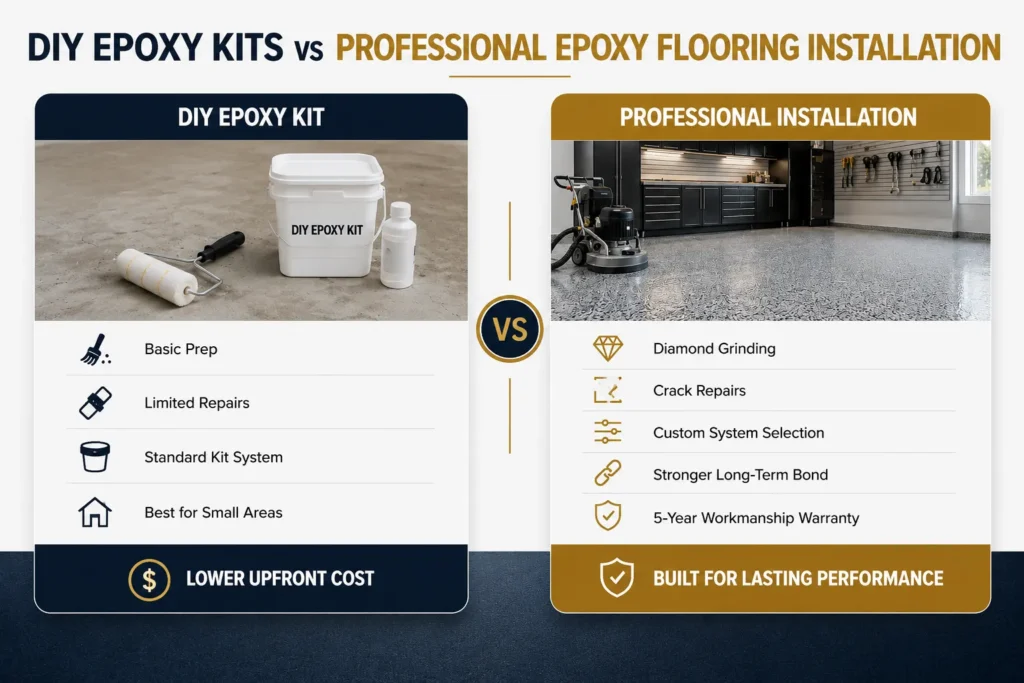
At Apex Epoxy Perth, we focus on the preparation and coating build-up that gives the floor a reliable bond.
We do not simply apply epoxy over a cleaned slab. We inspect the concrete, diamond grind the surface, repair defects where required, and select a system suited to the floor’s use, exposure, and finish requirements.
| Installation factor | DIY epoxy kit | Apex Epoxy Perth professional installation |
| Surface preparation | Usually limited to cleaning or acid etching | Professional diamond grinding to create a mechanical bond |
| Existing paint and coatings | Can be difficult to remove completely | Assessed and mechanically removed where required |
| Cracks and damaged concrete | Basic patching may be attempted | Cracks, holes, and spalled areas repaired and ground flush |
| Moisture and slab condition | Often not assessed before coating | Concrete condition reviewed before the coating system is selected |
| Coating system | Fixed kit components | Epoxy, full-flake, topcoat, and anti-slip options selected for the area |
| Outdoor performance | May not be suited to UV exposure | Suitable UV-stable topcoats used for applicable outdoor projects |
| Application equipment | Basic rollers and hand tools | Commercial grinders, dust extraction, squeegees, rollers, and preparation equipment |
| Application timing | Managed around the kit instructions | Mixing, coverage, recoat windows, and curing managed as one system |
| Workmanship support | Usually limited to product terms | Backed by Apex Epoxy Perth’s 5-year workmanship warranty |
Professional installation is particularly valuable for garages, driveways, patios, pool surrounds, workshops, warehouses, and commercial floors.
These areas are more likely to face vehicle traffic, sunlight, water, chemical spills, hot tyres, or damaged concrete.
Apex Epoxy Perth provides:
- Professional concrete grinding and surface preparation
- Crack and joint repair where required
- Full-flake, solid-colour, metallic, and commercial epoxy systems
- UV-stable and anti-slip coating options for suitable areas
- Clear advice on floor condition, preparation requirements, and curing time
- Obligation-free quotes and site inspections across Perth
- A 5-year workmanship warranty on completed installations
A professionally installed epoxy floor costs more than a basic DIY kit because it includes the preparation, repairs, equipment, product selection, and workmanship needed to build a durable system.
For homeowners and businesses that want a floor designed to last, proper preparation is the part that matters most.
Frequently Asked Questions About Epoxy Flooring Installation
How Long Should New Concrete Cure Before Epoxy Is Applied?
New concrete commonly needs around 28 days to cure before epoxy is considered. However, time alone does not confirm that the slab is ready.
The concrete should also meet the selected product’s moisture requirements and be properly prepared before coating.
New slabs may still contain excess moisture after the initial curing period, particularly in cool, humid, or poorly ventilated conditions. The installer should assess the slab before recommending a coating system.
Can Epoxy Be Applied Over Old, Painted, or Damaged Concrete?
Yes, epoxy can be installed over old or damaged concrete if the substrate is made sound first. Existing paint, sealers, failed coatings, oils, adhesives, and weak concrete need to be removed or repaired before epoxy is applied.
Cracks, holes, and spalled areas can often be repaired as part of the preparation process. However, active movement joints and unresolved moisture issues need specific treatment. Epoxy should not be used to hide underlying concrete problems.
Can Epoxy Flooring Be Installed in Hot or Humid Weather?
Epoxy can be installed in hot or humid conditions if the site conditions remain within the product manufacturer’s application limits.
High temperatures can shorten the epoxy’s pot life and recoat window. Humidity and temperature changes can increase the risk of condensation forming on the slab.
For outdoor projects, a dry weather window is essential. The coating should not be applied to wet concrete or where rain, dew, or condensation could affect curing.
Do Decorative Flakes Make an Epoxy Floor Less Slippery?
Decorative flakes can add texture and reduce the smoothness of a high-gloss epoxy surface, but they do not automatically provide the right slip resistance for every area.
Slip resistance depends on the topcoat, surface texture, anti-slip aggregate, contaminants, and how the floor is cleaned. Areas that get wet, such as pool surrounds, ramps, workshops, and outdoor paths, may need a specified anti-slip finish.
How Do You Maintain an Epoxy Floor After Installation?
Maintain an epoxy floor by removing grit regularly, cleaning spills promptly, and using suitable cleaning products.
Fine sand and dirt can act like abrasive material under shoes, tyres, and equipment, gradually dulling the surface.
For regular cleaning:
- Sweep or vacuum loose dirt and grit
- Mop with clean water and a neutral cleaner suitable for the coating
- Clean oil, chemicals, and spills promptly
- Avoid harsh abrasive pads unless approved for the floor system
- Use protective pads beneath heavy metal stands or equipment
- Avoid dragging sharp, heavy, or rough objects across the coating
Good maintenance protects the topcoat and helps the floor retain its appearance for longer.
Conclusion
A reliable epoxy floor starts with proper concrete preparation. Inspection, moisture assessment, diamond grinding, crack repair, dust removal, correct coating selection, and full cure time all play a role in the final result.
The epoxy itself is only one part of the system. The preparation beneath it determines whether the coating forms a durable bond or becomes vulnerable to peeling, bubbling, wear, and early failure.
For garage, residential, outdoor, and commercial epoxy flooring in Perth, Apex Epoxy Perth assesses the concrete before recommending a coating system. Our process includes professional surface preparation, crack repair where required, premium coating systems, and UV-stable topcoats for suitable exposed areas.